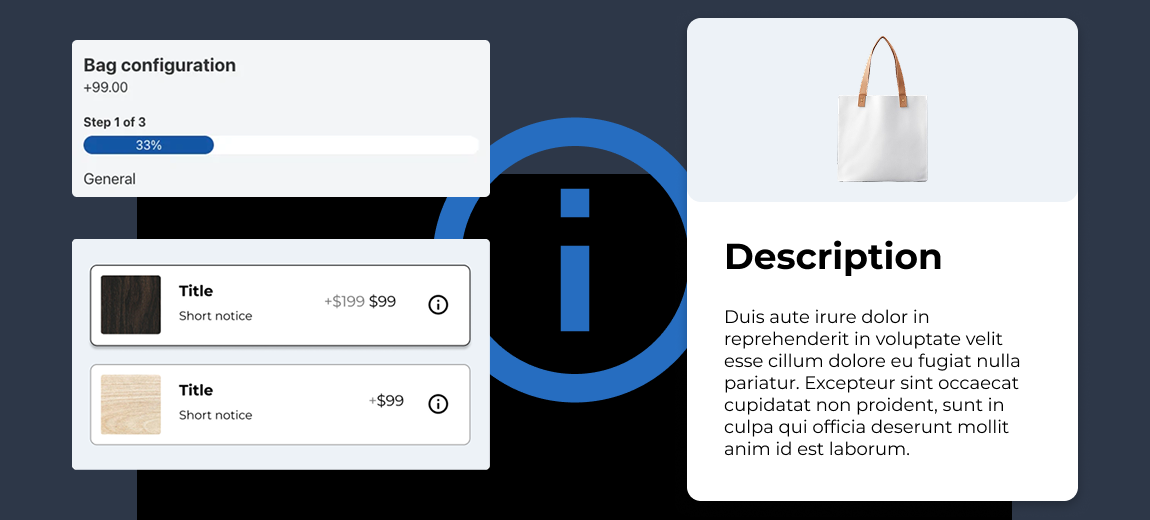
Increasing the average order value (AOV) is one of the most effective ways to grow your WooCommerce store’s revenue without needing more traffic.
Instead of constantly focusing on acquiring new customers, you can maximize the value of each purchase by offering add-on products. These simple additions can make a significant impact on your bottom line.
In this article, we’ll explore how WooCommerce add-on products work, why they help increase AOV, and how to implement them effectively in your store.
What is average order value (AOV)?
Average Order Value (AOV) is a key metric that represents the average amount a customer spends per transaction. It’s calculated using the formula:
AOV = total revenue ÷ number of orders
A higher AOV means more revenue per customer, which can significantly improve your bottom line. Especially when you’ve already invested in customer acquisition.
Why focus on AOV?
Improving average order value increases your revenue without requiring additional marketing costs. It allows you to make more money from existing traffic.
This approach also helps improve your profit margins, as you’re earning more per transaction without significantly increasing your overhead.
Focusing on AOV also boosts customer lifetime value, since buyers who spend more per purchase are often more engaged and satisfied with their experience.
In short, it’s a highly cost-effective growth strategy for WooCommerce store owners.
What are WooCommerce add-on products?
WooCommerce add-on products are optional extra product options or enhancements that a customer can choose to add to a primary product. These are often small, supplementary items or services that complement the main product being sold.
For example, you could offer a matching accessory with a shirt, a gift wrap option for a product, or an extended warranty for electronics.
These add-ons help personalize the shopping experience and give customers the option to build a more complete package. Instead of creating complicated product variations, add-ons provide a more flexible, user-friendly solution.

How add-on products drive higher AOV
Add-on products increase AOV by encouraging customers to spend a little more while they’re already in the buying mindset. When positioned correctly, these options feel like natural enhancements to the product.
For instance, a shopper buying a laptop might be interested in adding a protective case or an extended warranty. Someone buying a piece of furniture may want assembly services or a finish upgrade.
These add-ons don’t feel like upsells in the traditional sense. Instead, they improve the product’s value and usefulness, which increases the likelihood of a higher order total.
Types of add-on products that work
The best add-ons are those that feel natural and enhance the core product.
Here are a few examples for different industries:
- Fashion stores: matching accessories, custom embroidery, or premium packaging;
- Electronics: protective gear, warranty extensions, or setup services;
- Home decor and furniture: finish upgrades, assembly services, or care kits.
The key is to understand what your customers need to complete their purchase and offer those extras at the right moment.
Add-ons should never feel forced. They should feel like valuable options that improve the overall purchase.
How to add WooCommerce add-on products
WCB Configurator Builder makes it easy to add and display customizable product options without writing code. It allows store owners to add visual add-ons such as checkboxes, dropdowns, and image swatches directly to a product page and apply custom pricing to each selection.
Here is a step-by-step guide to adding add-on products using WCB Configurator Builder.
Before we start, make sure the WooCommerce plugin is installed and active.
Step 1: Install and activate the plugin
- Download WCB Configurator Builder plugin
- Go to Plugins > Add New in your WordPress admin.
- Upload the plugin file and activate it.

Step 2: Create or assign a product
- Go to Products > All Products
- Create a new product or choose an existing one
- Set up your product title, description, and price as usual.
You will be assigning the configurator to this product in the next steps.
Step 3: Add fields for add-on options
- Head over to WCB > Choices and click Add new. This creates a section that will hold related product options.
- Enter a title something relevant like “Add-on products” or “Optional extras” to keep your fields organized.
- Enter a label for your add-on field (e.g., “Add a custom case”)
- Choose the field type that fits your add-on. For example:
- Dropdown: Useful when you want to save space or offer multiple accessories.
- Option list: Best when offering one of several options, such as different warranty levels.
- Cards: Ideal for optional items like “Add a gift box for $5.”
- Swatches: Great for visual add-ons like selecting a fabric upgrade or accessory color.
- Define the individual options.

Step 4: Set pricing for each add-on
Each field can have its own pricing. You can set different price types:
- A fixed price (e.g., $10 extra for a gift wrap)
- A percentage price increase (e.g., add 15% for an upgrade)
- No price for free add-ons
WCB Configurator will automatically calculate and update the product price on the front end when selected.
Step 5: Create a new configurator
- Head over to WCB > Configurations and click Add New.
- Give your configurator a name
- Add Choices blocks to your configuration you created in step 3
- Scroll down to configurator data panel
- Set type to product and assign it to a product
- Choose the WooCommerce product you created or edited in step 2
- Save your changes.
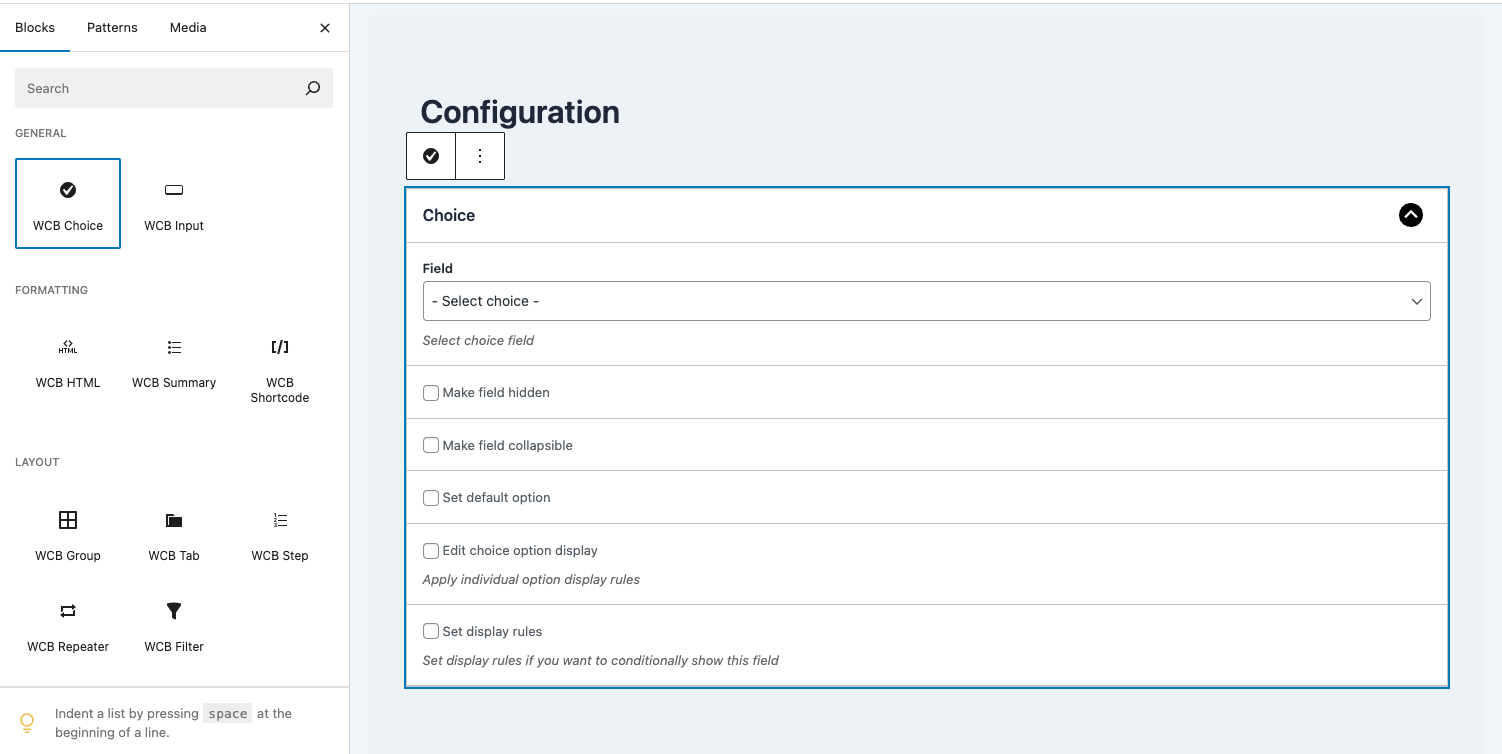
Step 6: Save and preview
Click Save configuration to apply your settings.
Now visit your product page on the front end. You should see the new add-on options listed as part of the product form. Try selecting different options and check that:
- The price updates automatically
- The selected add-ons appear in the cart
- The final total reflects the correct price
Best practices for WooCommerce add-ons
Highlight the added value
Always keep your add-on offerings relevant to the main product. When presenting options, use clear, descriptive labels that explain what the add-on includes. Show the value it brings, such as convenience, customization, or protection.
Update product visuals
If possible, include images for visual add-ons like material upgrades or accessories. This helps customers better understand what they’re getting and increases conversion.
Create kits or bundles
Offering bundles or grouped add-ons can also be effective. For example, if you sell cameras, you might offer a discounted accessory bundle that includes a memory card, case, and lens cleaner.
Responsive design
Make sure your add-on fields are optimized for both desktop and mobile users, ensuring that the buying experience remains smooth across devices.
Track the impact of add-ons on AOV
Once you start implementing add-ons, it’s important to track how they affect performance.
Monitoring
Use WooCommerce’s reporting tools to monitor changes in average order value over time. Plugins like Metorik or tools like Google Analytics can help you segment customers who added extras and evaluate conversion rates.
A/B testing
You can also A/B test different versions of your product page to see which add-ons or configurations drive the most revenue.
Manual testing
Regular testing is also useful. Try adjusting the placement, pricing, or description of add-ons to see what generates the best results. Simple changes can often lead to meaningful improvements.
Final thoughts
WooCommerce add-on products offer one of the most effective ways to increase average order value without complicating your sales funnel.
By giving customers the option to customize and enhance their purchase, you make your store more engaging, more profitable, and more aligned with their needs.
If you’re not using add-ons yet, now is the perfect time to start! With the right plugin and strategy, you can unlock hidden revenue and give your customers more of what they want.
FAQ
Do I need to create separate products for each add-on in WooCommerce?
No, with WCB Configurator Builder, you don’t need to create separate WooCommerce products for each add-on unless you want to track inventory or assign unique SKUs. You can simply include the add-on as a field within the configuration and apply a price.
Can I add conditional logic to show or hide add-ons?
Yes. WCB Configurator Builder allows you to set conditions for each field with the conditional display add-on, so you can show or hide specific add-ons based on previous selections. This is helpful for creating dynamic forms and simplifying the customer experience.
Can I offer free add-ons alongside paid ones?
Absolutely! You can set the price of any add-on to zero. This is useful for promotional offers like “free gift wrap” or “free engraving” while still giving customers the choice to opt in.
Will this work with variable products?
Yes you can extend WooCommerce variations with custom options as well. But WCB can also replace the need for WooCommerce’s built-in variations by giving you full control through our own option system.
Will the add-on selections appear in the cart and checkout?
Yes. As long as the setting to include selections in the order summary is enabled in the configurator, all chosen add-ons will display in the WooCommerce cart and checkout pages along with their pricing.
How do I track how add-ons are performing?
You can use WooCommerce reports, plugins like Metorik, or Google Analytics with enhanced eCommerce tracking to see which add-ons are being selected and how they impact average order value. Tracking this data helps refine your upselling strategy.