Enhancing your WooCommerce product pages with color swatches can dramatically improve the shopping experience. Instead of standard dropdowns, shoppers can select product colors visually through color or image swatches. With WCB Configurator Builder, adding both types of swatches is quick and intuitive.
In this guide, you’ll learn step-by-step how to add color and image swatches fields using WCB Configurator Builder. No coding required.
What are swatches in WooCommerce?
Swatches are interactive visual selectors that replace traditional dropdowns or radio buttons for product attributes like color, material, or style. Instead of reading through text-based options, customers can see and click the option they want. This makes the selection process easier and more engaging.
There are two main types of swatches:
Color swatches
Color swatches are small colored boxes that represent a specific shade or hue. These are commonly used for products like clothing, accessories, or home decor where the exact color matters to the buyer.
Example: Red, Blue, Green color blocks for a T-shirt.
- Helps customers quickly identify color options
- Reduces confusion caused by vague color names
- Can be styled as circles or squares

Image swatches
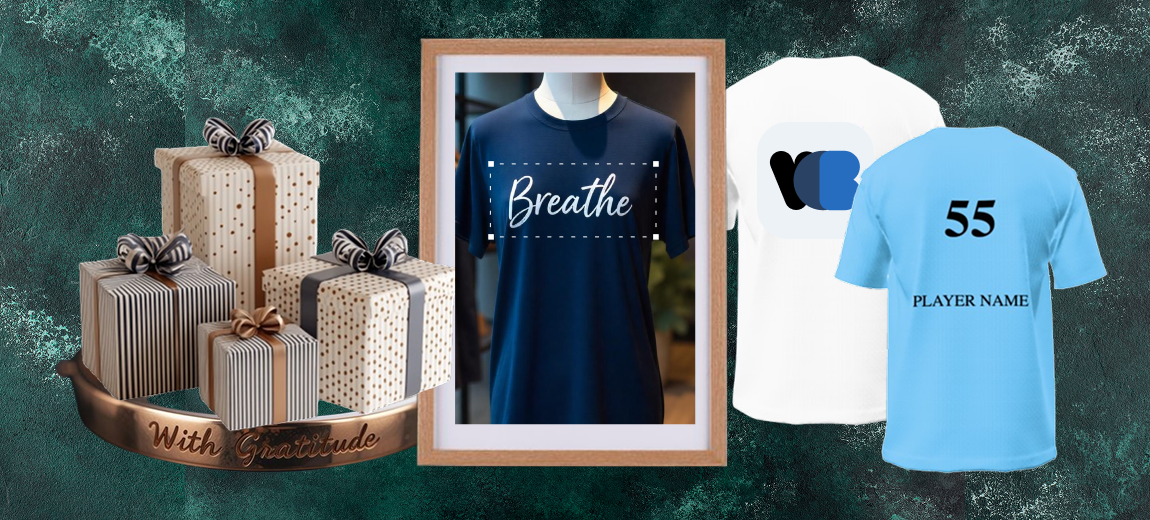
Image swatches are small thumbnails or previews of a texture, pattern, fabric, or style. These are ideal when color alone doesn’t tell the whole story—like in cases of patterned fabrics, leather types, or product finishes.
Example: A swatch showing denim texture, wood grain, or floral fabric.
- Provides more context than flat colors
- Useful for showcasing material, pattern, or style
- Can reflect real product appearance more accurately

Both types of swatches are supported by WCB Configurator Builder and can be used together for a dynamic, visual product configuration experience.
Why use color swatches in WooCommerce?
- Visual selection
Helps customers choose colors more intuitively - Improved UX
Eliminates the need for text-based color lists - Higher engagement
Interactive elements boost customer interest - More professional look
Great for fashion, accessories, decor, and custom products
How to add color and image swatches in WooCommerce
Now that you know what swatches are and how they improve UX, let’s dive into how to add them in your WooCommerce store using WCB Configurator Builder.
Prerequisites
Before getting started, make sure you have the following:
- A WooCommerce store set up
- The WCB Configurator Builder plugin installed and activated
- A few simple products set up to link swatches fields to
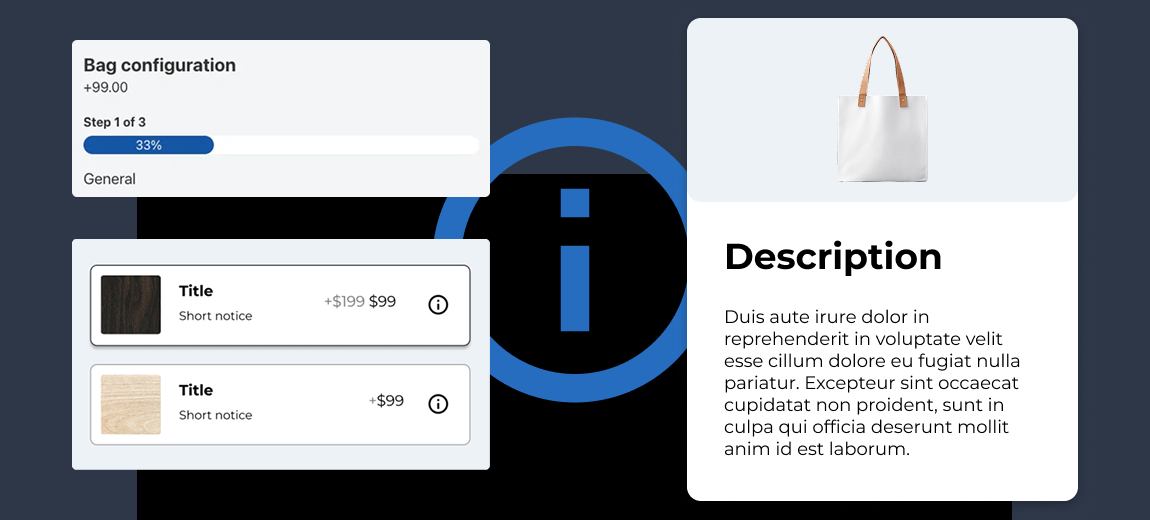
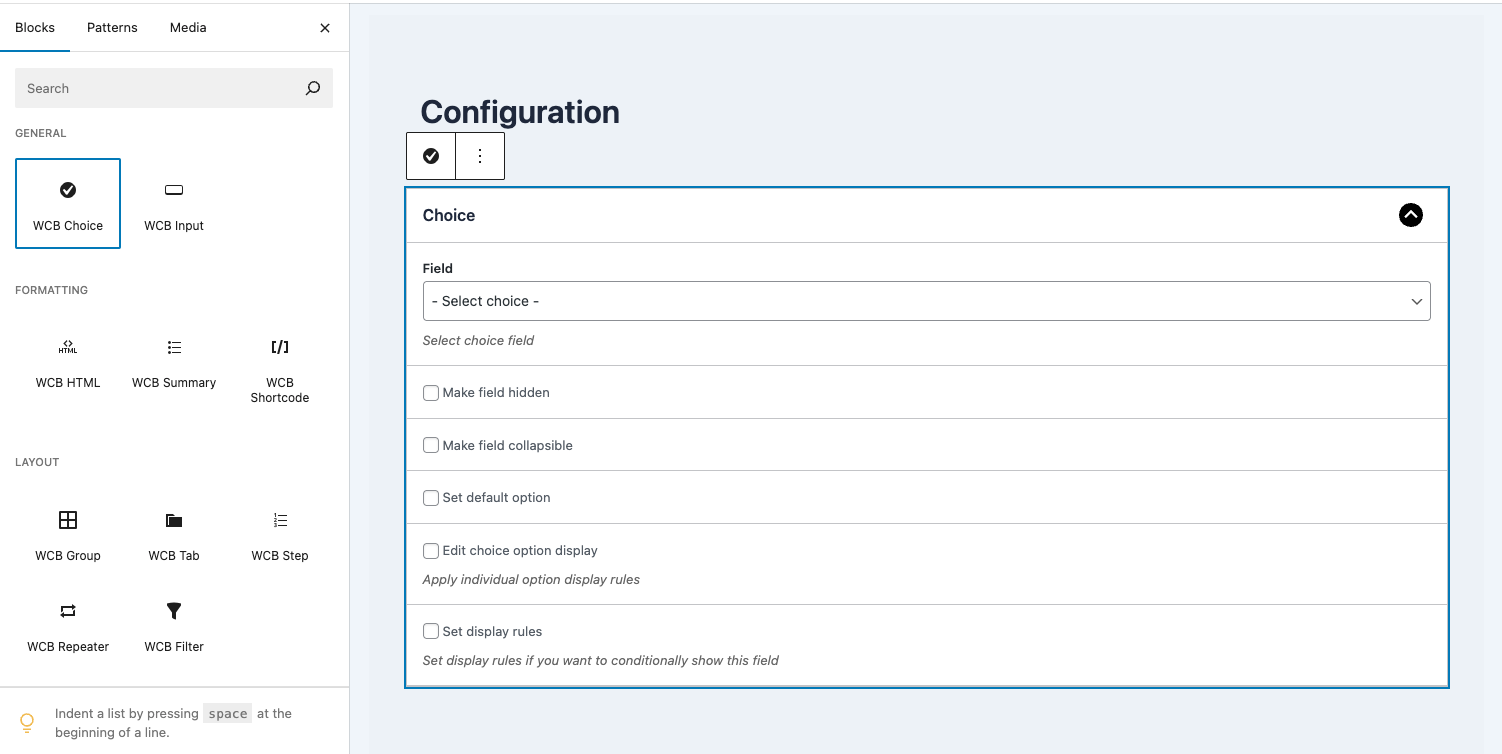
Step 1: Create a color or image swatches field
Let’s create a new field in WCB:
- Log in to your WordPress Dashboard.
- Head over to WCB > Choices and click the button “Add new”
- On the edit choice page, select Swatches as the field template.
- Set a Label (e.g., “Choose a Color” or “Select a Fabric”).
- Choose the type:
- Color for flat color blocks
- Label for pattern previews or real product thumbnails
Step 2: Add color or image swatches options
To set up color-based swatches:
- Click Add option.
- Set the Label (e.g., “Red”).
- Choose the Color code (e.g., #FF0000 for red).
- Repeat for each color.

To use image swatches instead of flat colors:
- Choose type of Label and make sure field thumbnails are enabled
- For each swatch option:
- Set the Label (e.g., “Leopard Print”).
- Set the Value (must match WooCommerce attribute).
- Upload an Image that visually represents the option (fabric, pattern, texture, etc.).
- Make sure the images are optimized (ideally 100x100px or similar) for fast loading.
Image swatches are great for stores selling fashion, furniture, or any visually distinct styles!

Step 3: Create your WCB configuration
- Navigate to WCB > Configurations.
- Edit an existing configuration or click Add New.
- In the builder interface, add a new Choice block
- Select your newly created Swatches field
Step 4: Link configuration to products
To make swatches appear on your product pages:
- On the configuration page, scroll down to “Configurator data” section
- For display type, select Product instead of Shortcode
- Select the products you want the swatches field to appear on
- Click Save Configurator.

Step 5: Update product visuals (optional)
You can also update the product image(s) based on the selected swatches options
- Head over to WCB > Visuals
- Create a new visual group
- Upload your visual images
- Link the image to the field swatch option
- Save the visual group

Step 6: Save and test
- Visit your product page.
- Test both color and image swatches to ensure they work on desktop and mobile.
Tips for better color swatches
- Use rounded or square swatch styles based on your brand look.
- Add labels to swatches for accessibility and SEO (e.g., “Royal Blue”).
You can show labels by enabling the swatch summary in WCB > Choice > Details tab - Optimize swatch layout for mobile users.
- Combine with image change triggers for a better preview experience.
Final thoughts
Adding a color swatches field in WooCommerce with WCB Configurator Builder is one of the easiest ways to elevate your online store’s user experience.
Whether you’re selling apparel, customizable products, or tech accessories, color and image swatches add professionalism and clarity to the product selection process.
With WCB Configurator, the entire process is visual, intuitive, and flexible. Perfect for store owners who want customization without code.
FAQ
Can I mix color and image swatches in the same field?
No, you cannot use mix color swatches and images swatches in the same field. Each field should contain either color or images swatches.
Do image swatches affect product image display?
Not by default, but you can link visuals to swatches options. In that case, selecting a swatch can change the main product image.
Are swatches mobile-friendly?
Absolutely! WCB Configurator Builder is responsive by design. You can control the amount of swatches per row for desktop, tablet and mobile.