What is a multi-step form?
A multi-step form divides a long form into several smaller sections, each one appearing on its own page or screen. The goal is to guide users through a logical sequence of steps, reducing the cognitive load and allowing them to focus on one thing at a time.
Multi-step forms can be used for product customization or any form of data collection where multiple pieces of information are required.
Why use multi-step forms in WooCommerce?


How to set up multi-step forms in WP Configurator Builder
WooCommerce doesn’t include multi-step forms by default, but you can easily add this functionality through plugins or custom development. Here’s how you can get started:
Step 1: Install and activate WP Configurator Builder plugin
Note: Make sure to get the advanced form fields add-on to be able to split up your form into multiple steps.
Once you’ve installed your plugin, you can start setting up your multi-step form.
Step 2: Create your multi step form
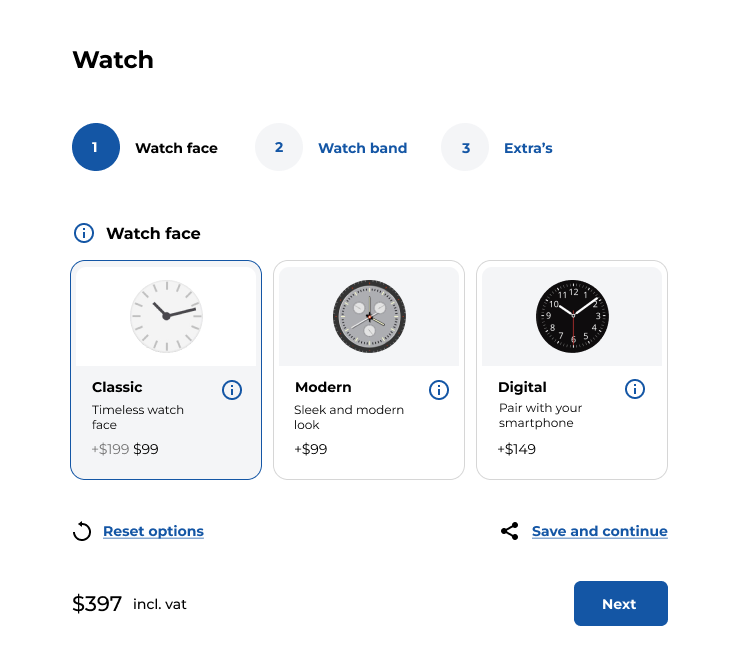
- Add steps: Using your plugin’s interface, divide the fields into logical steps. Each step should focus on a related set of fields, and you can typically add buttons like “Next” or “Previous” to navigate between steps.
- Set conditional logic (Optional): Many multi-step form plugins allow you to add conditional logic. This means certain fields can be shown or hidden based on user selections. For example, if a customer selects “Express Shipping,” additional shipping options can be displayed.
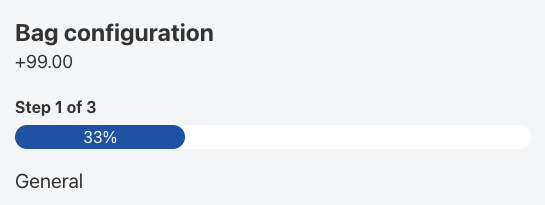
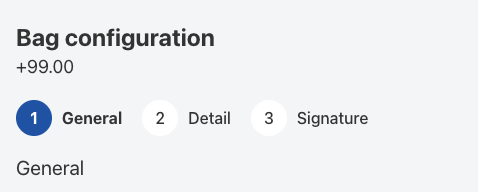
- Choose progress indicators: To help customers visualize their progress through the form, enable progress bars or step indicators. For example, you might show “Step 2 of 4” to indicate how many steps are remaining. WCB automatically displays numbers. You can change this to progress bar in WCB > Settings > General
Step 3: Customize your form’s design
Make sure the multi-step form aligns with your store’s branding and provides a seamless experience across both desktop and mobile devices. Most plugins allow you to customize button styles, form layouts, and other design elements.
Step 4: Test the form
Before going live, test the form to ensure the navigation, progress indicators, and form field logic are working as expected. Try completing the form yourself and ask others to test it as well to gather feedback and identify any areas for improvement.
Best practices for multi-step forms

Keep steps simple and focused
Each step in the form should be simple and focus on one specific task. Avoid putting too many fields in one step, as this could overwhelm the user. For example, if you’re creating a checkout process, don’t mix billing and shipping information on the same step. Keep them separate to maintain clarity.

Provide a progress indicator
Showing users where they are in the form process is crucial. A progress bar or step indicator like “Step 1 of 3” makes users feel like they’re moving toward the end goal and reassures them that they’re making progress.


Ensure mobile-friendliness
Multi-step forms should be designed with mobile devices in mind. Ensure that the steps are easy to navigate on smaller screens, with clickable buttons and minimal scrolling required. Mobile users are often more likely to abandon forms if the process is clunky or hard to read.

Use clear, concise instructions
Provide clear instructions at the beginning of each step to help users understand what they need to do next. For example, “Please enter your shipping address,” or “Choose your preferred payment method.”

Minimize form fields
Ask for only the most essential information in each step. Avoid unnecessary fields that can make the form seem long or intrusive. The more concise the form, the higher the chance users will complete it.